I have such an easy project for you folks that you're gonna run to Lowe's RIGHT after you read this to get the supplies for these suckers. Seriously, they take me like ten minutes to make and are SO cute.
I wanted to make (instead of buy) my family and friends some Christmas presents and this is what I did for several of them. And the best part? The total cost of this project was like...a WHOPPING $2 for four coasters. Yep, you heard that right. (Just so you know, it'll cost you more than that if you don't have the mod podge, stencils, and cork, but I already had that on hand so I didn't bother calculating that into my cost.)
TILE COASTER TUTORIAL
Here's what you'll need:
(You can get all this supplies at Michaels or Hobby Lobby and be sure to use a 40% off coupon!)
1. Mod podge.
2. Cork (I got the big squares and just cut them into little squares. $2.77 for a pack of 4)
3.Scissors.
4. Tiles (Get these at Lowe's or Home Depot for around 33 cents a piece!)
5. Scrapbook paper of your choice. You only need one sheet if you are making four coasters.
6. Stencils and paint (optional).
7. Paintbrush for painting on the mod podge.
8. Hot glue gun (not pictured) to glue your cork on the back of the tiles.

Step One:

Make sure your furry children do not lay on top of your project. Huey loves to do this for some reason.
Step Two:

Step Three:

Hot glue the cork squares on the back of the tile. That way it won't scratch your purty little furniture!
Step four:

Step five:
(this is optional if you want to add the first letter of your last name or anything else of that sort)
I chose to add a J since our last name is Jones. I got the stencil from Micheals and it came with each letter of the alphabet. Just paint the stencil with paint and then press it down in the center of your paper.


Now wait for it to dry. If you want to speed up the process, use a hair dryer to make it dry faster but be careful not to make it run!
After that is done-
Step Six:
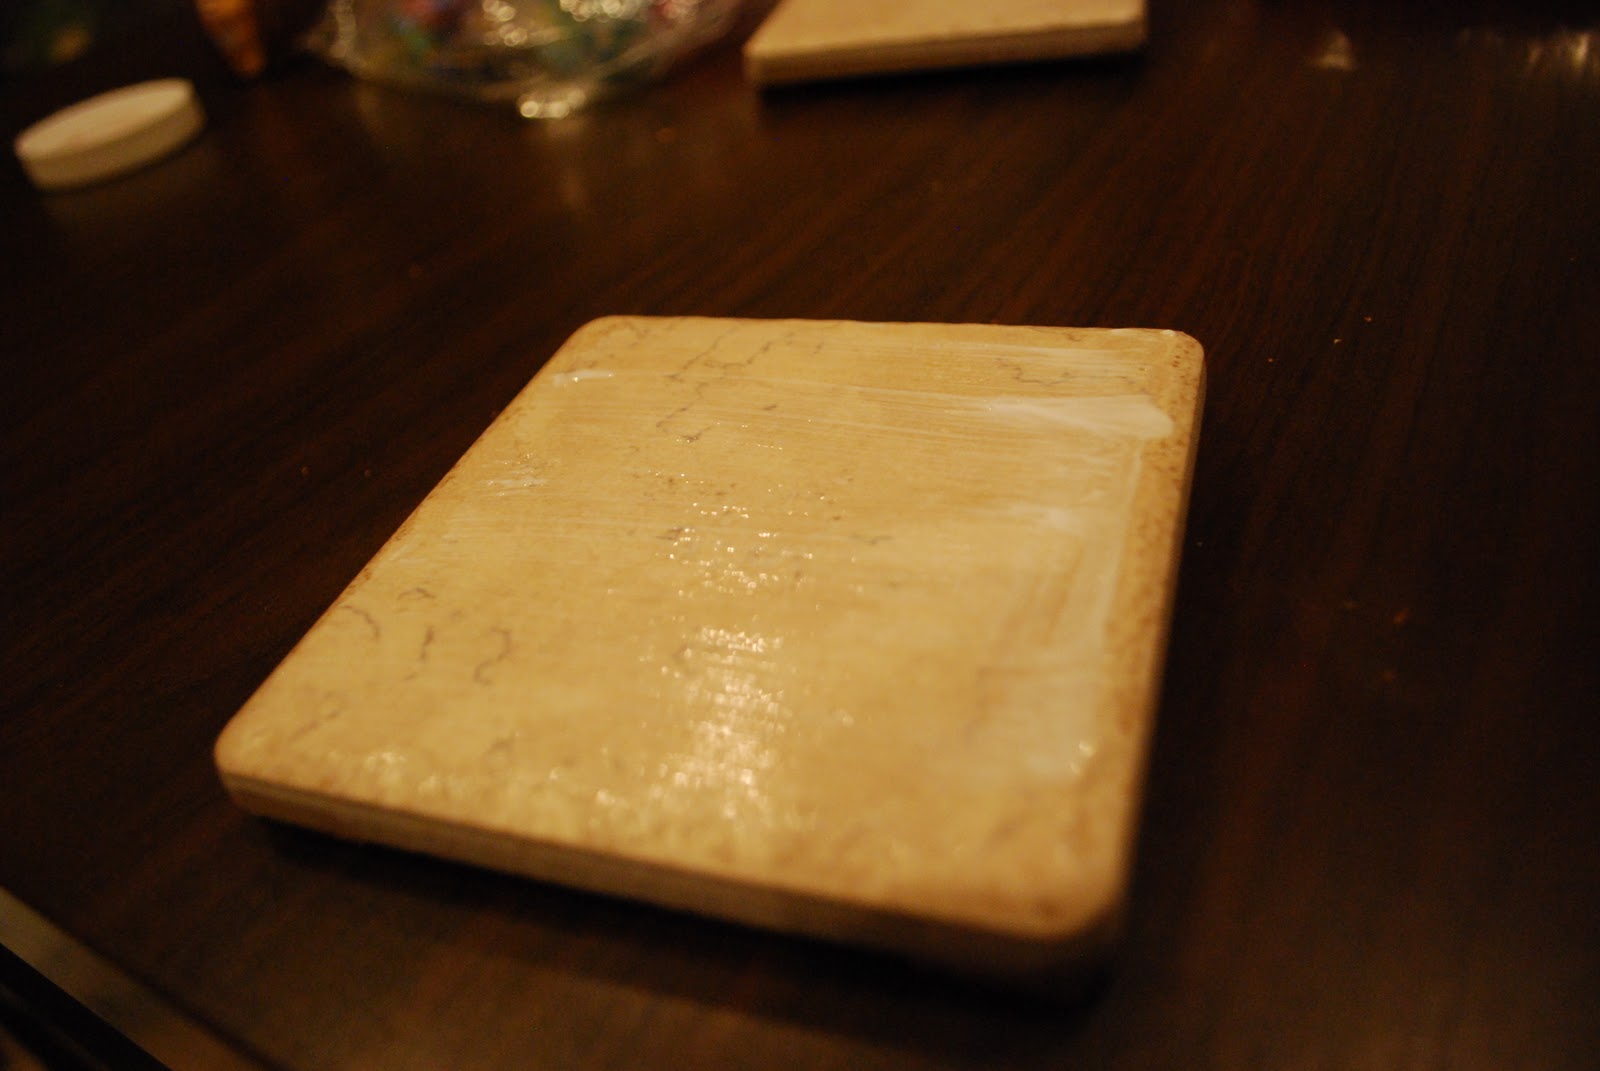
Get your mod podge and paint a layer of it on the tile. Not too much but not too little either. If you put too much, it'll seep over the edges. Then get your square of paper and press it on top of the tile.

Put another coat of mod podge over the top. You can see from the picture that there are air bubble underneath the paper. Don't worry, just get your finger and press them out. Your finger will be sticky, but that's okay! Just wipe it off with a paper towel and go about your business. :)
and you're done!


This is a wonderful gift and can be personalized to any holiday, season, or event! I made some for Valentine's day and Christmas! Just buy some coordinating scrapbook paper for 25 cents a page!
Easy as pie!
-Kait
This post brought to you by:

fat and lazy cat.
Haha Huey cracks me up!
ReplyDeleteAny time I take on a DIY project or am trying to take pictures of something, our cat Woods is right there in the middle of it...they think they are "helping" but it couldn't be further from the truth :)
I love this tutorial by the way, and will definitely be trying it out myself soon. Thanks for sharing!
love the coasters =) I Made some for our work gift exchange and some for my mom =)
ReplyDeleteThese are darling. I love the idea of using scrapbook paper. The possibilities are endless!
ReplyDeleteNice coasters. And your cat is a hoot!
ReplyDeletei love those coasters!! so cute!! i'll have to try that!!
ReplyDelete& that cat is hilarious!!!!
I'll immediately grab your rss as I can't find your e-mail subscription hyperlink or e-newsletter service.
ReplyDeleteDo you've any? Please permit me understand in order that I could subscribe. Thanks.
My site: click here
Very good article. I will be dealing with many of these issues as well.
ReplyDelete.
Here is my web site :: visit
I am in fact delighted to glance at this blog posts which consists of tons of helpful data, thanks for providing
ReplyDeletesuch data.
Also visit my page See More
Hello, Neat post. There is a problem together with
ReplyDeleteyour web site in web explorer, may check this?
IE still is the marketplace leader and a huge portion of other folks
will miss your great writing due to this problem.
Review my web-site ... http://www.lztube.com/PatsyLeig
Hi there, You have done an incredible job. I'll certainly digg it and personally suggest to my friends. I'm sure they'll be benefited from this web site.
ReplyDeletemy homepage: Milf Porn
Thanks for finally writing about > "Easy and cute DIY coasters." < Liked it!
ReplyDeleteMy homepage :: stranger video chat
I go to see every day a few blogs and sites to read content, however this
ReplyDeleteweblog gives quality based posts.
Also visit my blog; View It - pornharvest.com
What's up i am kavin, its my first time to commenting anyplace, when i read this article i thought i could also make comment due to this good paragraph.
ReplyDeleteStop by my website ... http://digitalsouls.com/modules.php?name=Your_Account&op=userinfo&username=JillianTr
Excellent post. I will be dealing with a few of these issues as well.
ReplyDelete.
Feel free to surf to my blog - visit website